A USB wiring diagram provides a visual representation of USB cable connections, detailing pin configurations, power, and data lines․ Essential for electronics projects, it guides users in understanding and creating custom USB cables, ensuring proper functionality and safety․ This section introduces the fundamentals of USB wiring diagrams, their importance, and where to find reliable PDF resources for reference․
1․1 Importance of USB Wiring Diagrams
USB wiring diagrams are essential for understanding and working with USB connections․ They provide a clear visual representation of pin configurations, power lines, and data transmission paths․ These diagrams are crucial for diagnosing and repairing faulty cables, ensuring safe and proper connections․ They also aid in designing custom USB cables and adapters, making them indispensable for electronics projects․ By following a wiring diagram, users can avoid short circuits and ensure reliable data transfer․ This makes them a vital resource for both professionals and hobbyists working with USB technology․
1․2 Brief History of USB Technology
USB technology emerged in the mid-1990s as a universal standard for connecting devices․ The first USB 1․0 specification was released in 1996, offering data transfer speeds of 1․5 Mbps․ Over the years, USB evolved through versions 2․0, 3․0, and 3․1, significantly improving speed and functionality․ Today, USB-C represents the latest advancement, supporting high-speed data transfer, power delivery, and multi-purpose connectivity․ This evolution has made USB a cornerstone of modern electronics, enabling seamless communication between devices and peripherals across industries․
1․3 Purpose of a Wiring Diagram
A wiring diagram serves as a blueprint for understanding and creating USB connections․ It maps pin configurations, power lines (VCC, GND), and data transmission lines (D+, D-)․ This visual guide aids in troubleshooting faulty cables, designing custom USB solutions, and ensuring safe connections․ By following a wiring diagram, users can avoid short circuits and ensure reliable data transfer․ Additionally, it helps in identifying optional pins for specialized functions, making it an indispensable tool for electronics projects and USB cable modifications․ Reliable PDF resources provide detailed diagrams for reference․

Understanding USB Connectors and Ports
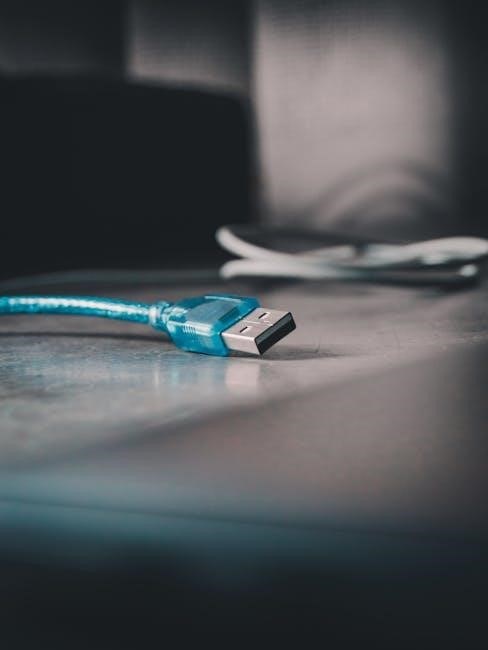
USB connectors and ports vary in types, including USB-A, USB-B, USB-C, and Micro USB, each designed for specific applications․ Ports come in standard, mini, and micro sizes, ensuring compatibility across devices․ Understanding these connectors and ports is crucial for identifying their roles in wiring diagrams, enabling users to connect devices securely and efficiently․ This knowledge also helps in selecting the right cables for data transfer and power delivery, ensuring optimal performance and compatibility with modern electronics․
2․1 Types of USB Connectors (USB-A, USB-B, USB-C, Micro USB)
USB connectors include USB-A, commonly used in host devices like computers, and USB-B, typically found in peripherals․ USB-C is a versatile, reversible connector supporting faster speeds and power delivery․ Micro USB, a compact version, is widely used in mobile devices and supports OTG functionality․ Each type has specific pin configurations, essential for wiring diagrams․ Understanding these connectors is crucial for designing and troubleshooting USB cables, ensuring compatibility and proper functionality across various devices․ This knowledge aids in selecting the right connector for specific applications, optimizing performance and reliability․
2․2 USB Port Configurations (Standard, Mini, Micro)
USB ports are available in Standard, Mini, and Micro configurations, each designed for specific applications․ Standard ports are the most common, found on computers and larger devices․ Mini USB ports are smaller and were often used in older electronics․ Micro USB ports are compact, widely used in mobile devices, and support OTG functionality․ These configurations differ in size and pin layout, but all adhere to USB standards․ Understanding these port types is essential for designing compatible wiring diagrams and ensuring proper device connectivity․ Each configuration serves unique needs, from high-speed data transfer to power delivery․
2․3 Key Differences Between USB Versions (1․0, 2․0, 3․0, 3․1)
USB versions differ significantly in speed, power delivery, and functionality․ USB 1․0 supports 1․5 Mbps, suitable for basic devices․ USB 2․0 offers 480 Mbps, ideal for external drives․ USB 3․0 boosts speeds to 5 Gbps and enhances power delivery․ USB 3․1 doubles the speed to 10 Gbps and introduces USB-C with reversible design and higher power output․ Each version improves performance and compatibility, catering to evolving device needs․ Understanding these differences is crucial for designing wiring diagrams that match specific USB standards and ensure optimal functionality․

USB Wiring Diagram Components
A USB wiring diagram includes connectors, pins, power lines (VCC, GND), data lines (D+, D-), and optional pins (ID, OTG)․ These components ensure proper data transfer and power delivery;
3․1 Pin Configurations for USB Connectors
USB connectors feature standardized pin configurations to ensure compatibility and functionality․ For example, USB-A has four pins: VCC (power), GND (ground), D+ (data positive), and D- (data negative)․ USB-B typically includes four or nine pins, depending on the version․ USB-C, with 24 pins, supports higher speeds and reversible design․ Micro USB variants (Micro-A, Micro-B) also use four pins․ Correctly identifying and mapping these pins is crucial for designing and troubleshooting USB wiring diagrams․ Always refer to the specific USB version and connector type for accurate configurations․
3․2 Power and Data Lines (VCC, GND, D+, D-)
USB wiring diagrams identify power and data lines as VCC (voltage source), GND (ground), D+ (data positive), and D- (data negative)․ VCC supplies power to devices, while GND provides a return path for current․ D+ and D- facilitate data transmission between host and device․ These lines are essential for establishing communication and power delivery․ Proper connection of these lines ensures reliable operation․ Incorrect wiring can lead to malfunctions or damage․ Always verify the diagram’s accuracy to avoid errors during cable assembly or repair․
3․3 Optional Pins (ID, OTG, etc․)
Optional pins in USB wiring diagrams, such as ID and OTG, serve specialized functions․ The ID pin helps identify device types, while OTG enables on-the-go communication between devices․ These pins are not always present but are crucial for specific applications․ Understanding their roles is essential for custom or advanced USB projects․ Incorrect wiring of these pins can disrupt communication or power delivery․ Always consult the official USB specification or a reliable wiring diagram PDF to ensure proper configuration and avoid errors during implementation․
How to Read a USB Wiring Diagram
Understanding USB wiring diagrams involves identifying symbols, color codes, and connection paths․ Familiarize yourself with standard notation to interpret power, data, and optional pins accurately․
4․1 Visual Representation of Connections
A USB wiring diagram visually represents connections using lines, shapes, and symbols․ Straight lines depict wires, while rectangles or circles denote connectors․ Color coding highlights power (red), ground (black), and data lines (green/orange)․ Dots or arrows indicate pin connections․ The layout shows how pins on one connector link to another, simplifying complex wiring․ By following the lines and symbols, users can trace connections easily, ensuring proper cable assembly․ This visual approach aids in understanding USB circuitry for DIY projects or repairs, making it indispensable for technicians and enthusiasts alike․
4․2 Symbols and Notations Used
USB wiring diagrams use standardized symbols and notations to represent components and connections․ Common symbols include circles for connectors, lines for wires, and arrows for data flow direction․ Color coding is often used, with red for power (VCC), black for ground (GND), and green/orange for data lines (D+, D-)․ Labels like “D+” or “GND” clarify pin functions․ These symbols and notations ensure clarity, making it easier to interpret and assemble USB cables correctly․ Consistency in symbols across diagrams aids in understanding complex connections at a glance․
4․3 Interpreting Wire Colors and Their Functions
In USB wiring diagrams, wire colors are standardized to indicate specific functions․ Red wires typically represent power (VCC), while black wires denote ground (GND)․ Green and white wires are reserved for data transmission (D+ and D-)․ Additional colors may be used for optional pins like ID or OTG․ Understanding these color codes is essential for correctly identifying and connecting wires․ Standardization ensures consistency, making it easier to interpret and work with USB wiring diagrams for various applications and versions of USB technology․

Steps to Create a USB Wiring Diagram
Determine the USB connector type, map physical connections, and use design tools to create an accurate diagram․ Ensure precision for reliable USB functionality and safe connections․
5․1 Identifying the USB Connector Type
Start by determining the specific USB connector type (e․g․, USB-A, USB-B, USB-C, or Micro USB) for your wiring diagram․ Each connector has unique pin layouts and functionalities․ USB-A is commonly used for host devices, while USB-B connects to peripherals․ USB-C is reversible and supports higher speeds․ Micro USB is often found in older mobile devices․ Referencing official USB specifications or manufacturer documentation ensures accurate identification․ This step is critical for creating a precise and functional wiring diagram․ Use a USB wiring diagram PDF as a reference for visual confirmation․
5․2 Mapping Physical Connections
Once the connector type is identified, map the physical connections between pins․ USB connectors have standardized pin layouts, with specific roles for power (VCC, GND) and data (D+, D-) lines․ Refer to a USB wiring diagram PDF to ensure correct pin-to-pin connections․ Use tools like multimeters to verify continuity and isolate faults․ Accurate mapping prevents shorts and ensures proper functionality․ Double-checking connections is crucial for reliable operation․ Always follow the diagram’s guidance for precise wiring․
5․3 Tools and Software for Designing Diagrams
Various tools simplify the creation of USB wiring diagrams․ Adobe Illustrator and Inkscape are ideal for vector-based designs․ CircuitLab is useful for simulating and visualizing connections․ Fritzing is popular for PCB and electronics projects․ Lucidchart and draw․io are great for simple, collaborative diagrams․ USB wiring diagram PDFs can be created using these tools․ Always ensure software is updated for compatibility with the latest USB standards․ These tools help in producing clear, accurate diagrams essential for proper USB cable assembly and troubleshooting․
Common USB Wiring Diagrams
USB wiring diagrams include standard connections like USB-A to USB-B, USB-C to USB-A, and Micro USB to USB-A, serving as essential guides for understanding cable connections․
6․1 USB-A to USB-B Diagram
A USB-A to USB-B diagram illustrates the wiring connections between a standard USB-A connector and a USB-B connector, commonly used for printers or external drives․ It details pin assignments, including power (VCC), ground (GND), and data lines (D+ and D-)․ This diagram is essential for understanding how devices communicate and transfer data․ The wiring typically follows a straightforward configuration, ensuring compatibility and proper signal transmission․ It is widely used in industrial and consumer electronics for reliable connections․ Always refer to official USB specifications for accuracy․
6․2 USB-C to USB-A Diagram
A USB-C to USB-A diagram outlines the wiring connections between the reversible USB-C connector and the traditional USB-A port․ It supports USB 2․0 and 3․0 standards, ensuring compatibility with older devices․ The diagram shows VCC, GND, and data lines (D+ and D-) configurations, enabling reliable power delivery and data transfer․ This wiring is essential for applications requiring high-speed communication․ Always consult official USB specifications to ensure accuracy and compatibility when designing or troubleshooting USB-C to USB-A connections․
6․3 Micro USB to USB-A Diagram
A Micro USB to USB-A diagram illustrates the wiring connections for devices using Micro USB connectors․ It typically includes a 5-pin configuration, with VCC, GND, and data lines (D+ and D-)․ The optional ID pin is used for specific applications․ This diagram ensures proper power delivery and data transfer between Micro USB devices and standard USB-A ports․ It supports USB 2․0 and 1․1 standards, with a maximum current of 500mA․ Always reference official USB specifications to avoid wiring errors and ensure compatibility․
Troubleshooting USB Wiring Issues
Identify faulty connections and verify pin configurations․ Use tools like multimeters to detect short circuits or open lines․ Repair or replace damaged cables promptly to ensure reliability․
7․1 Identifying Faulty Connections
To identify faulty connections, inspect the USB cable for physical damage or corrosion․ Use a multimeter to check continuity between pins․ Verify that VCC and GND lines are not shorted․ Ensure D+ and D- wires are properly connected and not crossed․ Compare the wiring diagram to the actual connections․ Look for signs of overheating or burn marks․ Test each pin individually to confirm it matches the USB wiring diagram․ Replace any damaged or incorrectly wired components to restore functionality․ Always refer to the official USB wiring diagram for accuracy․ Regular testing prevents data loss and ensures reliable performance․
7․2 Common Wiring Mistakes
Common wiring mistakes include incorrect pin alignments, mixed connections, or reversed wires․ Ensure VCC and GND are correctly paired to avoid short circuits․ D+ and D- wires must be properly connected to maintain data integrity․ Reversed wires can prevent proper communication between devices․ Always verify the wiring diagram before soldering․ Using incorrect resistors or omission of necessary components can lead to malfunction․ Double-check connections to avoid data transfer issues․ Use high-quality materials and follow official USB wiring diagrams to minimize errors․ Testing each connection with a multimeter can help identify hidden faults early․
7․3 Tools for Testing USB Cables
Essential tools for testing USB cables include multimeters, USB cable testers, and software diagnostic tools․ Multimeters measure voltage, current, and continuity, helping detect short circuits or open connections․ USB cable testers quickly identify faulty wires or pins․ Software tools like USBlyzer analyze data transfer speeds and detect issues․ These tools ensure cables function correctly and help pinpoint problems․ Regular testing prevents data loss and ensures reliable connections․ Always use trusted tools to maintain accuracy and safety when troubleshooting USB wiring diagrams․

USB Wiring Diagram PDF Resources
Access reliable USB wiring diagram PDFs from official sources like USB․org, manufacturer websites, or electronics forums․ Verify authenticity by checking official logos or peer reviews․ Use design software or online tools to convert diagrams to PDF format for easy sharing and printing․ Always ensure diagrams are accurate and up-to-date for safe and effective USB wiring projects․
8․1 Reliable Sources for Downloading PDFs
Obtain USB wiring diagram PDFs from trusted sources like official USB․org, manufacturer websites (e․g․, Intel, VIA Labs), or reputable electronics forums․ Many hardware companies provide detailed schematics for their USB connectors․ Additionally, platforms like All About Circuits or EEWeb offer verified diagrams․ Always ensure the source is credible to avoid incorrect or outdated information․ For custom projects, check forums or communities dedicated to electronics and DIY projects for shared resources․ This ensures accuracy and compatibility with your specific USB version and connector type․
8․2 How to Verify the Accuracy of a Diagram
To ensure a USB wiring diagram PDF is accurate, cross-reference it with official USB specifications from USB․org․ Verify pin configurations match the connector type (e․g․, USB-A, USB-C) and version (e․g․, USB 2․0, 3․0)․ Check for consistent labeling of power (VCC, GND) and data lines (D+, D-)․ Use tools like multimeters to test cable functionality․ Look for revision dates or disclaimers indicating updates․ Ensure the diagram aligns with your device’s specific requirements to avoid mismatches or damage․ Always prioritize diagrams from trusted sources or manufacturers for reliability․
8․3 Converting Diagrams to PDF Format
To convert a USB wiring diagram to PDF, use online converters or software like Microsoft Office or Adobe Acrobat․ Export the diagram from its original format (e;g․, JPG, PNG, or CAD) and select PDF as the output․ Ensure high resolution for clarity․ Add metadata like the diagram’s title, version, and date for organization․ Use password protection if sensitive․ Review the PDF for accuracy before sharing or printing․ This ensures compatibility and professional presentation across devices․

Safety Tips for Working with USB Wiring
Always handle USB wiring with care to prevent damage․ Avoid short circuits, ensure proper insulation, and use protective gear․ Safely dispose of damaged cables to prevent hazards․
9․1 Avoiding Short Circuits
Avoiding short circuits is crucial when working with USB wiring․ A short circuit occurs when power and ground wires inadvertently connect, causing excessive current flow․ This can damage devices, overheat cables, or even lead to fires․ To prevent this, ensure proper insulation of wires, avoid crossing power (VCC) and ground (GND) lines, and use a USB wiring diagram to guide connections․ Always test cables with a multimeter before use and inspect for frayed or exposed wires․ Properly soldered joints and secure connections are essential for safety and reliability․
9․2 Proper Handling of USB Connectors
Proper handling of USB connectors is essential to ensure durability and functionality․ Always align connectors correctly before insertion to avoid bent pins․ Avoid forcing connectors into ports, as this can cause physical damage․ Clean dirty or corroded ports gently with compressed air or a soft cloth․ Store cables neatly to prevent tangles and wear․ Regular inspection for signs of damage, such as frayed wires or loose connections, can prevent issues․ Proper handling extends the lifespan of USB connectors and maintains reliable performance․
9․3 Safe Disposal of Damaged Cables
Safe disposal of damaged USB cables is crucial to protect the environment and adhere to regulations․ Always check local e-waste guidelines for proper disposal methods․ Do not dispose of cables in regular trash, as they contain harmful materials like lead and cadmium․ Instead, recycle them through designated electronic waste centers or participate in manufacturer-sponsored recycling programs․ Proper disposal prevents toxic substances from polluting soil and water․ Ensure cables are securely packaged to avoid damage during transport․ Consult your USB wiring diagram PDF for specific disposal recommendations if available․
FAQs About USB Wiring Diagrams
This section provides answers to frequently asked questions about USB wiring diagrams, covering common issues and best practices for creating and using them effectively․
10․1 What is the difference between USB 2․0 and USB 3․0 wiring?
USB 2․0 and USB 3․0 wiring differ in speed and pin configuration․ USB 2․0 operates at up to 480 Mbps with four wires, while USB 3․0 supports up to 5 Gbps with nine wires․ The additional wires in USB 3․0 enable faster data transfer and better power delivery․ USB 3․0 also introduces SuperSpeed lines, enhancing performance for high-bandwidth devices․ Understanding these differences is crucial for selecting the right wiring diagram for your needs․
10․2 Can I create a custom USB cable using a wiring diagram?
Yes, you can create a custom USB cable using a wiring diagram․ Ensure you use an accurate diagram specific to your USB version (e․g․, USB 2․0 or USB 3․0)․ Gather the correct connectors, wires, and tools․ Follow the diagram carefully to avoid mismatches․ Use high-quality materials to ensure reliability․ If unsure, consult official documentation or test the cable with a multimeter before use to verify connections and prevent potential damage or data loss․
10․3 How do I fix a faulty USB connection?
To fix a faulty USB connection, first check the cable for physical damage or dirt․ Clean the connectors gently with a soft cloth․ Test the cable on another device or port to isolate the issue․ If wiring is the problem, refer to a USB wiring diagram to identify and repair any incorrect connections․ Ensure all pins are properly aligned and not bent․ If the issue persists, replace the faulty cable or port․ Always use high-quality materials to avoid recurring problems․

Best Practices for Using USB Wiring Diagrams
Always follow official USB wiring diagrams for accuracy․ Use high-quality materials and verify connections before powering up․ Ensure proper alignment of pins to avoid damage or short circuits․
11․1 Always Refer to Official Documentation
Using official USB wiring diagrams ensures accuracy and compliance with standards․ These documents are verified by manufacturers, reducing errors and safety risks․ Always cross-reference with the latest specifications and guides provided by reputable sources․ Official documentation includes detailed pin layouts, voltage requirements, and proper connection methods․ This helps avoid miswiring and ensures compatibility across devices․ Prioritize manufacturer-provided PDFs over unofficial sources for reliability․ Regularly update your resources to align with the latest USB standards and advancements in technology․
11․2 Double-Check Pin Configurations
Verifying pin configurations is crucial for proper USB wiring․ Misaligned pins can cause data loss or hardware damage․ Always cross-reference the wiring diagram with the official USB specifications․ Pay attention to power (VCC, GND) and data lines (D+, D-)․ Ensure compatibility between connectors, such as USB-A to USB-C or Micro USB․ Double-checking prevents common errors like reversed or omitted pins․ Use official PDF diagrams to confirm the correct layout for your specific application․ This step ensures reliable connections and optimal performance across all USB versions and devices․
11․3 Use High-Quality Materials
Using high-quality materials ensures reliable USB connections and durability․ Choose cables with thick, pure copper wires for optimal conductivity․ Insulation should be robust to prevent signal interference․ Connectors made from corrosion-resistant metals maintain long-term performance․ Refer to USB wiring diagram PDFs for specifications․ Avoid cheap alternatives, as they may degrade quickly or fail to support faster USB versions․ Investing in premium materials guarantees consistent data transfer and power delivery, minimizing the risk of malfunctions or safety hazards․
Mastery of USB wiring diagrams ensures reliable connections and safe practices․ Always prioritize accuracy and quality materials for optimal performance and longevity in USB-related projects․
12․1 Summary of Key Points
Understanding USB wiring diagrams is essential for troubleshooting and creating custom cables․ Key components include pin configurations, power lines (VCC, GND), and data lines (D+, D-)․ USB connectors vary, with USB-C offering enhanced speed and reversibility․ Always refer to official documentation to ensure accuracy․ Proper safety practices, like avoiding short circuits, are crucial․ High-quality materials and tools, such as multimeters, ensure reliable connections․ Troubleshooting common issues like faulty pins or incorrect wiring can extend cable lifespan․ Regularly updating knowledge on USB standards ensures compatibility with newer devices and technologies․
12․2 Final Tips for Working with USB Wiring Diagrams
Always use high-quality materials to ensure durability and reliability․ Double-check pin configurations before soldering to prevent errors․ Label cables clearly for easy identification․ Store diagrams in an organized digital format for quick access․ Regularly test cables with a multimeter to detect faults․ Follow safety guidelines to avoid damage or injury․ Keep updated with the latest USB standards for compatibility․ Practice proper cable management to prevent tangling and wear․ Consider using protective sleeves for cables exposed to harsh environments․ Refer to official USB specifications for precise wiring instructions․
12․3 Encouragement to Explore Further Resources
Exploring further resources can deepen your understanding of USB wiring diagrams․ Visit official USB specifications for detailed insights․ Online forums and communities often share practical tips and solutions․ YouTube tutorials provide visual guidance for complex wiring tasks․ Technical blogs and manufacturer websites offer valuable diagrams and troubleshooting guides․ Leveraging these resources will enhance your skills and ensure your projects are reliable and safe․ Take the time to explore these tools to stay updated and proficient in working with USB wiring diagrams․